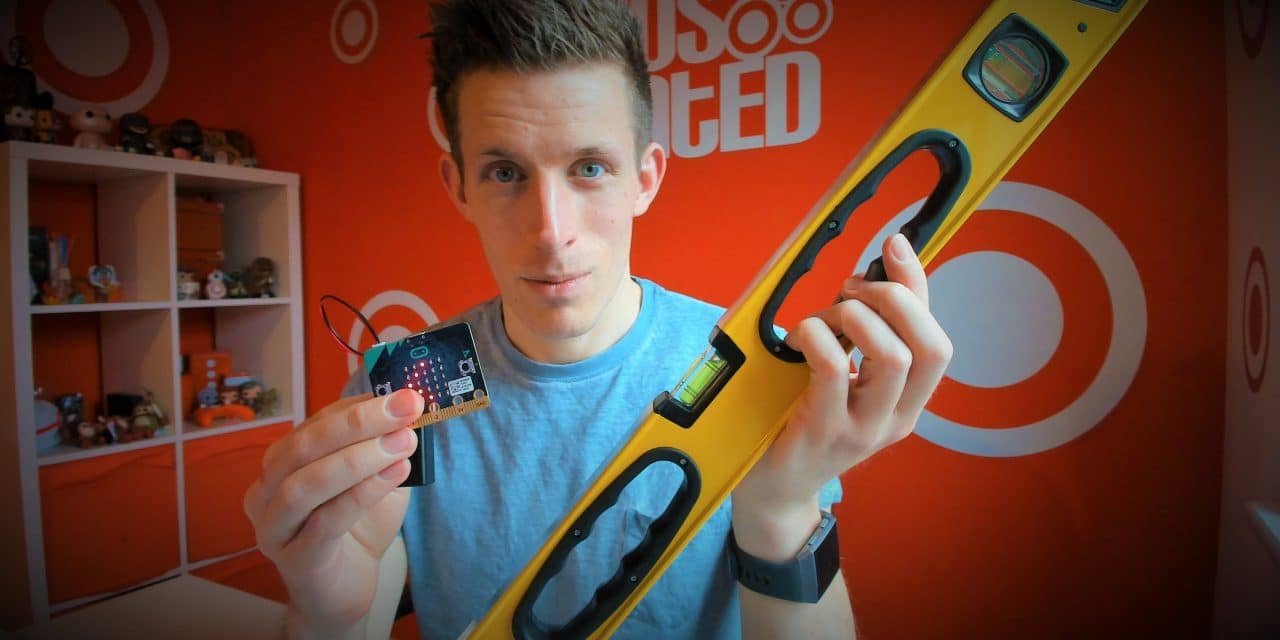
In this project, we are going to turn our BBC micro:bit into a digital spirit level, a tool designed to indicate whether a surface is horizontally flat. A spirit level is an instrument used by carpenters, stonemasons, bricklayers, and other building trades workers.
Traditionally, spirit levels have a glass vial filled with a coloured liquid, leaving a bubble in the tube. When that bubble is central within the glass vial, it indicates that the spirit level is resting on a perfectly flat surface.
During this lesson, we will explore how we can create a digital spirit level using the BBC micro:bit.
The BBC micro:bit contains a sensor called an accelerometer. An accelerometer is found in smartphones and other devices (such as fitness bands and Wii remotes) which measures the motion of the device. On a phone, this sensor may be used to work out which way your device is pointing (useful on navigation apps, or on stargazing apps). On a Wii remote, this could work out whether you’re chopping or swiping the device. On a fitness band, the accelerometer is used to help calculate how many steps you have taken by looking at the movement of the device and, therefore, the movement of your body.
In a later project, we’ll create a working fitness device using the accelerometer! During this project, we will use the accelerometer to get the angle of the micro:bit and then we’ll use that reading to display information on the micro:bit’s screen to indicate whether or not the surface is flat.
Part 1: Let’s get a reading from the accelerometer
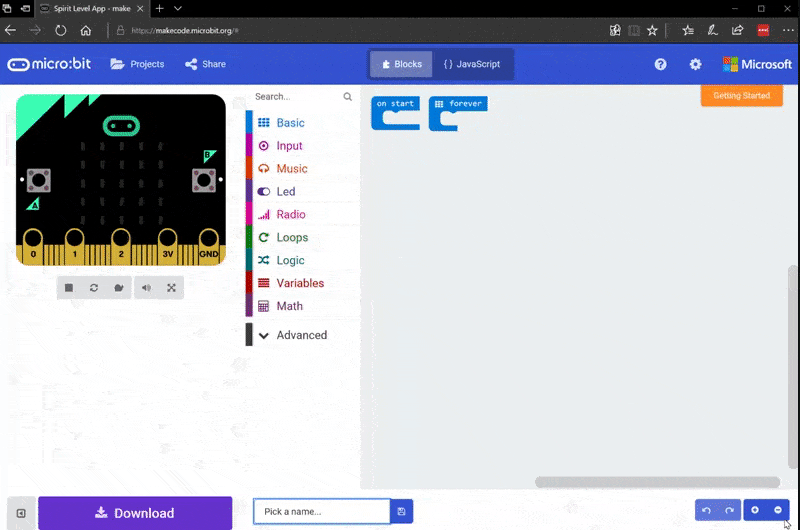
So, let’s build a spirit level using the BBC micro:bit’s JavaScript Blocks Editor. Let’s create a new project. And let’s call this app Spirit Level App (we’ll name our app at the bottom of the screen so it is easy for us to find amongst our projects).
Let’s name our app so we can find it later. It will help us find our project amongst our other apps, and also name our downloadable hex file later when we want to copy our project onto the micro:bit.
Once that’s done, let’s think about how a real spirit level works.
On a real spirit level, we get to see the “results” (how flat a surface the spirit level is on) in real time. We don’t have to press a button to see anything. So we can emulate this in our app by using the Forever loop. Any code that runs inside a Forever block will execute until we switch off the micro:bit, or we tell it to stop. The code will run on an endless loop.
So, let’s take a look at how we can get a reading from the accelerometer inside the BBC micro:bit.
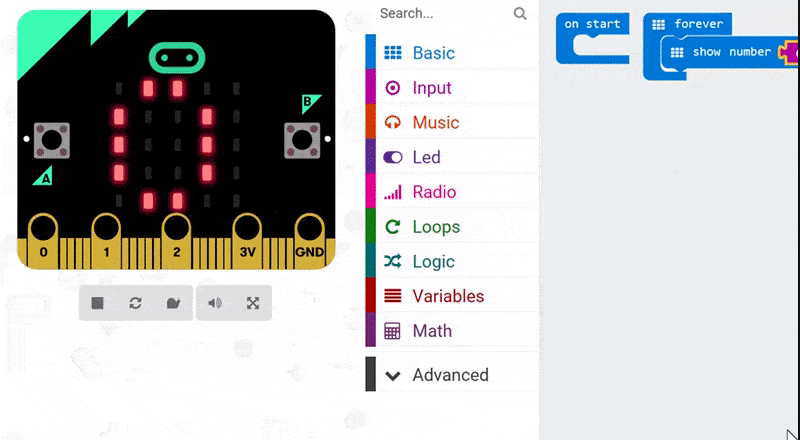
What we’re going to do first is use our Show Number block of code from the Basic menu as the accelerometer gives us back a number as a reading. This number will be a positive number if the micro:bit is leaning to the right and a negative number, so a minus number, if it is leaning to the left.
We’re going to use Show Number to get a reading from the accelerometer.
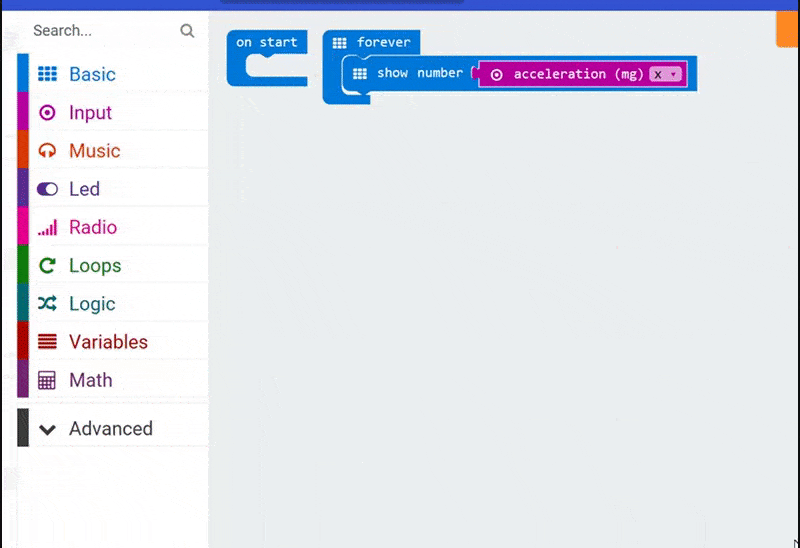
The accelerometer is an input – it’s collecting information from the outside world, just like a microphone, or a button. So we’re going to grab the Acceleration (mg) block from the Input menu and add it to the end of our Show Number code (replacing the 0).
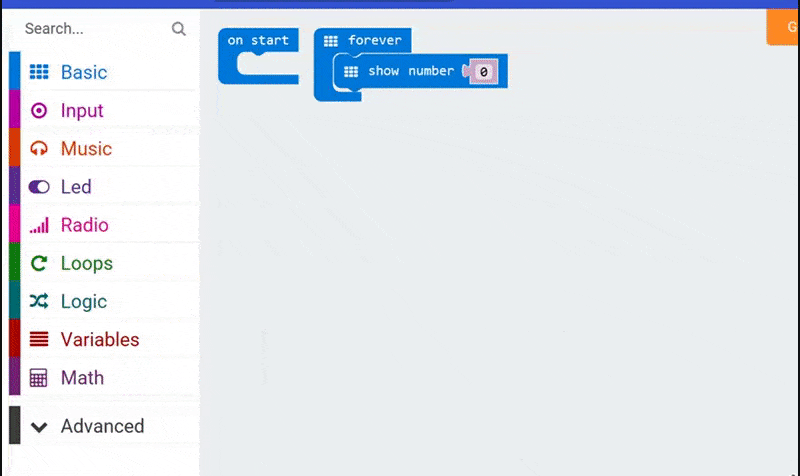
Let’s add the Acceleration block to the end of our Show Number line.
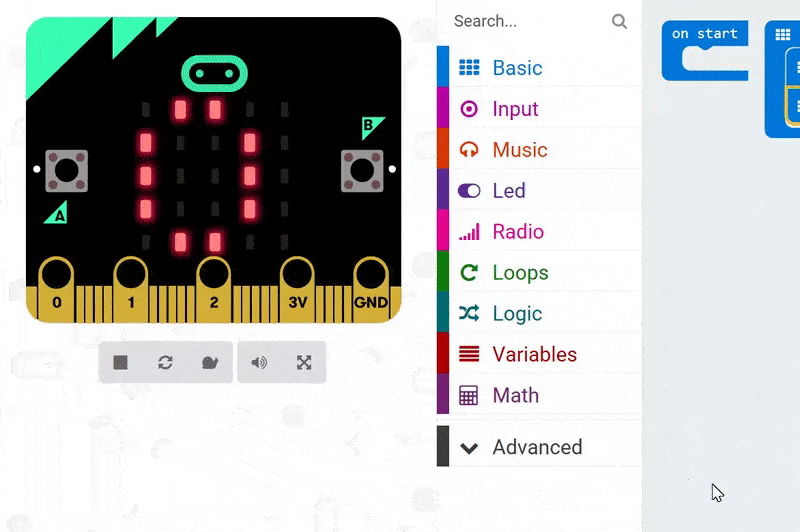
You’ll notice now, if you mouse over the micro:bit emulator, you’ll start to see some numbers, but it is a bit of a mess right now. The micro:bit is picking up the motion of the device, and it is showing something, but it’s all a bit messy!
Okay, we have a reading but it is a bit of a mess!
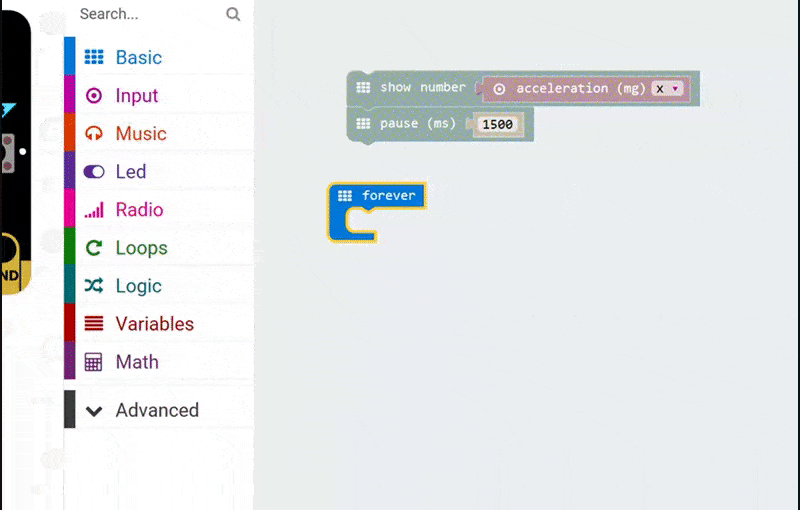
That’s because our micro:bit isn’t given enough time to display the entire result before it starts displaying the next reading. So let’s add a Pause (ms) block to the end of our Forever loop block. Remember, pauses are measured in milliseconds (ms). There are 1000ms in an entire second, so I’m going to add a 1500ms pause (which is a pause of one and a half seconds). That should be enough time for us to see a proper reading.
Let’s add a 1500ms Pause (ms) block to our code so we can see the reading clearly.
Perfect! Now we can clearly see our readings as we mouse over our micro:bit emulator.
If you mouse all the way over to the left of the emulator, you’ll get a reading of around -1024, and all the way to the right gives you 1024. If I hold my mouse perfectly in the center, you should see a reading of 0.
Explore the readings you’re seeing. Look how the readings change depending on how much you’re tilting your micro:bit.
You now have a working spirit level. The closer the reading is to 0, the flatter the surface!
But, wait! Right now our app is a little too complex. The beauty of a real spirit level is that it’s very easy to read and see whether a surface is flat. Our app, as it is, is quite geeky and too digital, and you have to wait to see the reading before you can make any adjustments. So let’s make our app more visual using some coding logic!
But, for now, let’s try loading our app onto our micro:bit so we can give it a test on a physical device.
Part 2: Let’s make a more elegant app
Through playing with the code we wrote in part 1, we know that we’ll see a number between -1024 and 1024. That means, there’s 2048 possible readings for the micro:bit to pick up on. Did you manage to see 0 when you were testing your app on your device? It’s tricky, right?
I think it would be fair to say that a reading between -10 and 10 would indicate that the surface is flat, or extremely close to being flat. So we can build some logic into our code that would indicate, on the screen, that our micro:bit is flat if it has a reading between -10 and 10.
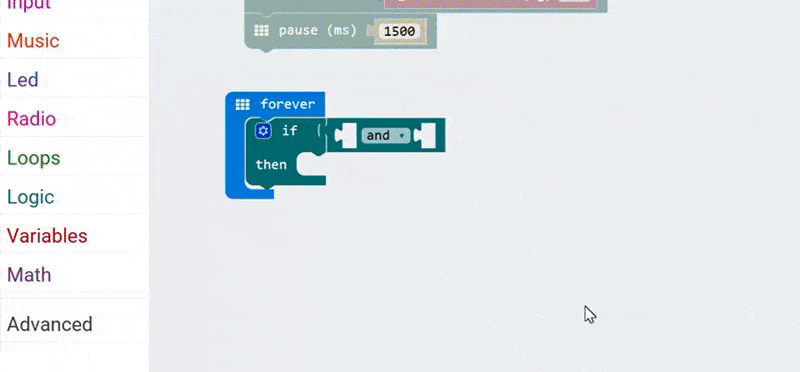
Let’s give that a go now. Let’s remove our existing code from the forever loop now. And, instead, let’s grab an If block from the Logic menu. We can also delete the Start block of code from the project as we won’t be using it.
Let’s drag an If block, from the Logic menu, into our Forever block.
An If block let’s us check if something is true, and then act upon it if it is. What we’re checking for here is whether the accelerometer is giving us a reading between -10 and 10. So those two things both need to be true. The reading needs to be greater than -10 but also less than 10 to give us a flat surface reading. So we need to use an And block. We’ll drop this over the word true in our If block.

We’ll use an And block to check that two things are true.
Now we can fill in those two blank spaces.
From the Logic menu, we’ll grab two 0 = 0 blocks and drop one in each of the blank spaces in our And block. If this looks confusing, don’t worry, it will make sense in a minute. Remember what we are going to check for…
Let’s add two 0 = 0 blocks into our code.
We now need to adjust our two statements so that one is checking for a number equal to or more than, and the other is checking for a number that is equal to or less than. We need to use the symbols that relate to equal to or more than and equal to or less than. Those are the > and < symbols with the underscore ( _ ) underneath.
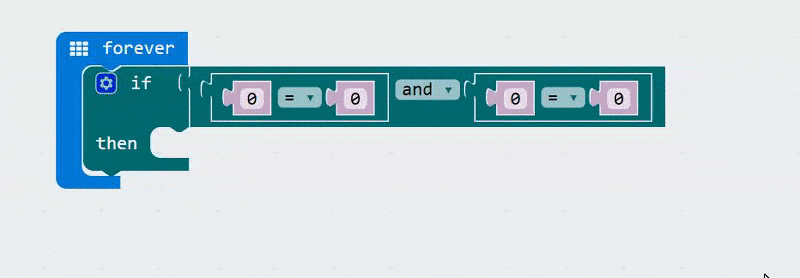
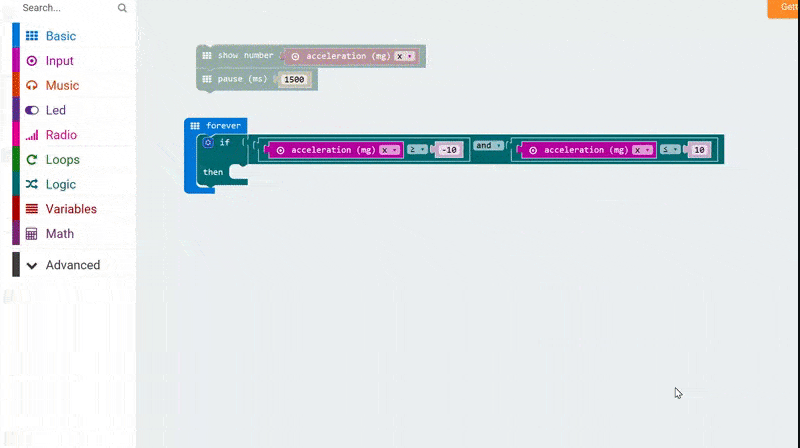
Now we can use the Acceleration block from the Input menu, which we used at the start of the project, to complete the equation. Let’s fill in the blank spots now so that we’re checking for a number equal to or more than -10, and equal to or less than -10.

Let’s drop an Acceleration block into the first space in each sum.

Now we can fill in the missing numbers.
If the accelerometer gives a reading which is equal to or less than 10, and equal to or more than -10, then any code we put inside the If block (next to the word Then) will run. So we could draw a tick in here, using the Show LEDs block from the Basic menu to indicate that our surface is flat!
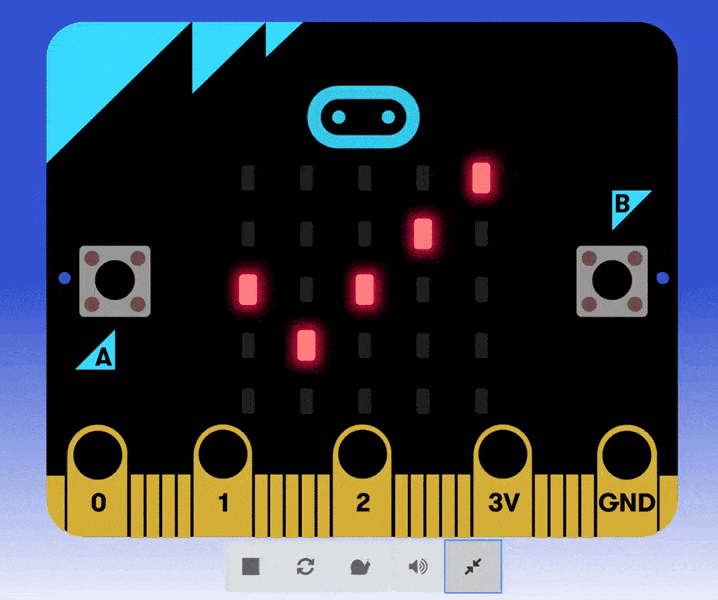
How cool! Now we can complete our project by building a couple of indicators that show the user that the surface is not flat. To do this, we can repeat the above code and add in two more logic statements. Remember, we used equals to or less than 10 and equals to or greater than -10. So, we can use less than -10 and greater than 10 to indicate the surface is not flat. We could also draw some arrows to show the user which way their spirit level is leaning. See if you can complete this code yourself, before looking at the solution below. You’ll need to add two more If blocks underneath our current code (or before, if you wish, but I think it will look cleaner underneath).
Here’s my finished code…
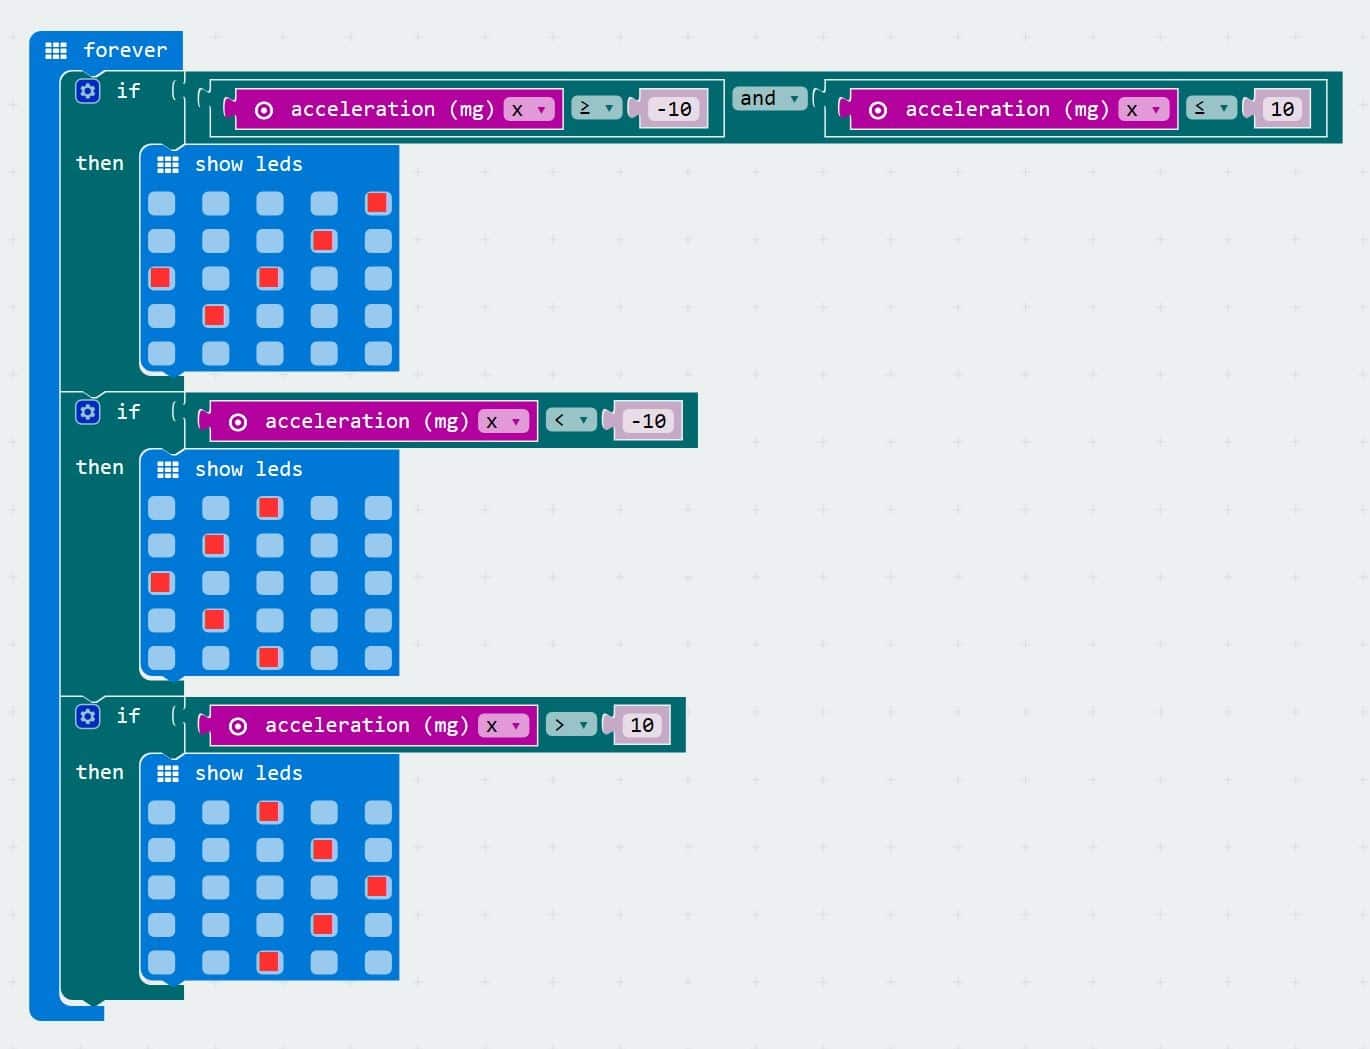
My complete spirit level app code, complete with graphical indicators!
Now, you’re ready to show off your spirit level app! You can test it in the browser, or copy it onto a device! If you feel like the spirit level is too sensitive, you could change all the 10s to 20s (remembering to change -10 to -20 wherever you see it too).
My finished spirit level app!
Well done!